Categories
Fitness & Training

The Fundamentals Of A Solid Fitness Training Program

Tribe By Noire

The Fundamentals Of A Solid Fitness Training Program

Real success towards reaching your fitness is in understanding the fundamentals of a solid fitness training program. You don’t want to be like most people in the gym who just go to the gym with no real game plan, you want to train. Training requires a program that lays out a solid path and natural progression. A few of the things I’m going to cover here are,

  1. What qualifies as a fitness goal.
  2. The 4 phases of a training session.
  3. The training bell curve.
  4. The micro, meso, and macro cycle.
the fundamentals of a solid fitness training program

What Qualifies As A Fitness Goal

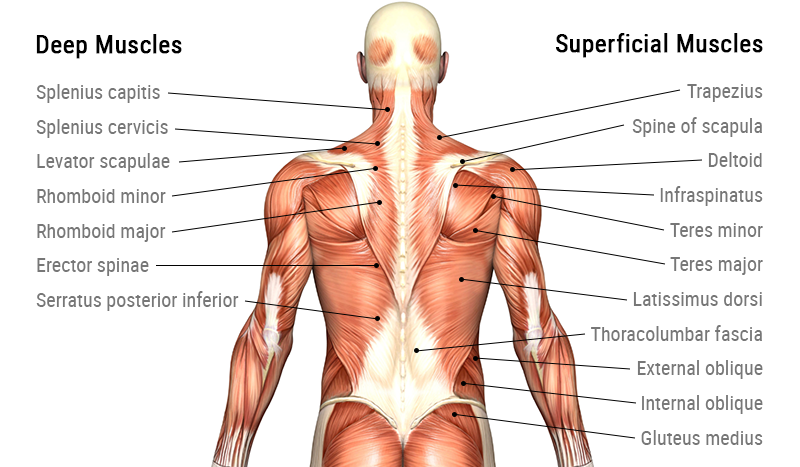
To put it simply, a fitness goal is a goal that can only be reached through training. Fitness is the measure of how well you move. This includes things like strength, endurance, power, and mobility. Aside from improving performance there are training goals that revolve around body re-composition. This is where your training is put together with the intent to tailor your physique to look a certain way.

While body re-composition is a legitimate fitness goal, weight loss is not. Weight loss is not a legitimate fitness goal because you don’t need to train to lose weight. The only real way to manipulate your weight is through your diet. There is no shortage of people in the gym doing hours of cardio in a failed attempt to lose weight. Cardio is for improving cardiovascular performance, not weight loss.

The 4 Phase Of A Training Session

Your workouts shouldn’t just be a perpetual string of random exercises. The ideal workout should have 4 phases that flow seamlessly into one another in a specific order.

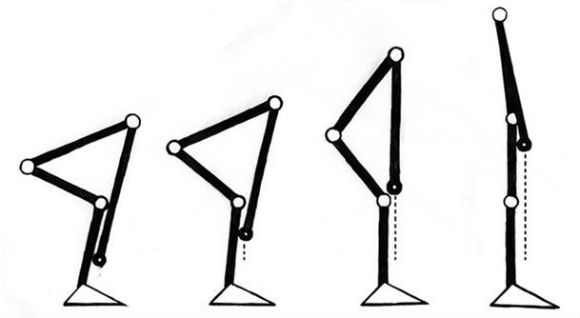
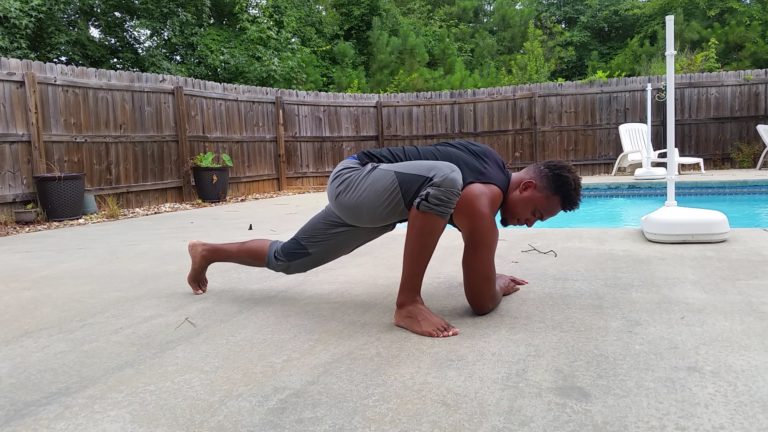
PHASE 1 – MOVEMENT PREP

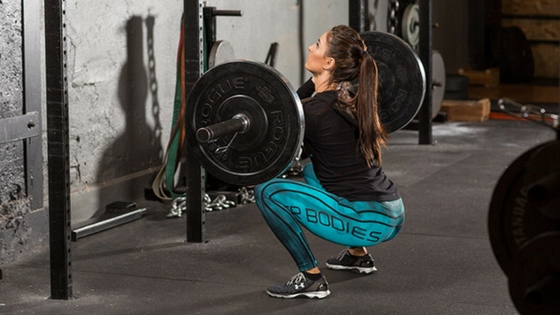
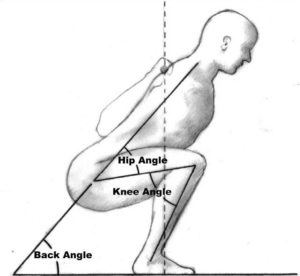
This is the part where you get your body ready for the work you’re about to do, in other words, warm up. If today is going to be an intense squat day, you want your movement prep to be geared towards loosening the muscles and joints of that movement, and setting an efficient squat pattern. The same goes for any other primary movement or movements of the day.

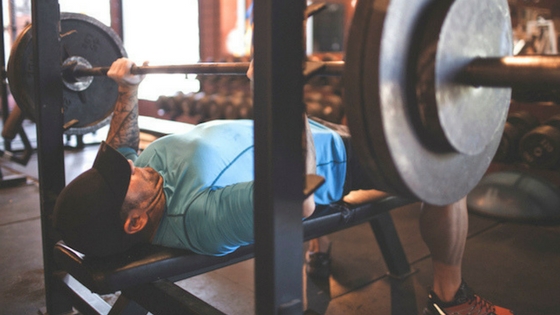
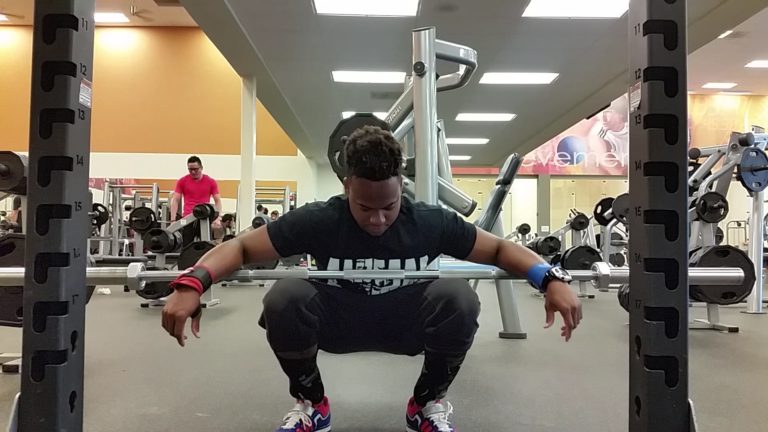
PHASE 2 – PRIMARY MOVEMENTS

This is the phase where you tackle your main objective of the day. Your primary work would be where you target a specific movement and or skill. This is typical the most intense part of the workout in terms of performance output. An example of this would be a powerlifter targeting the conventional deadlift for the training session. Ideally the powerlifter would target a high load on the deadlift for low amount of reps. 

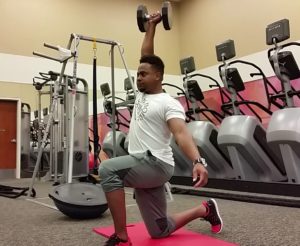
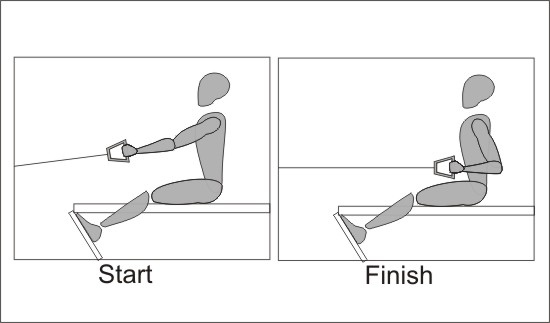
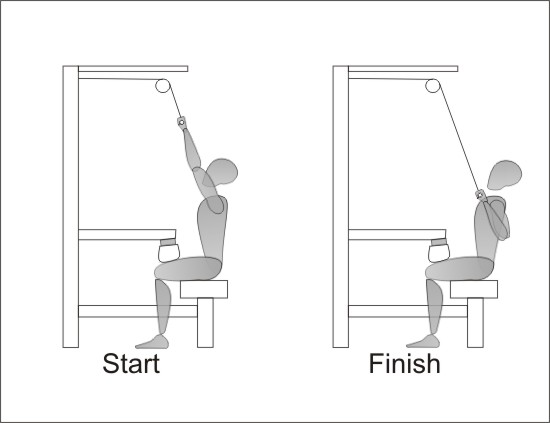
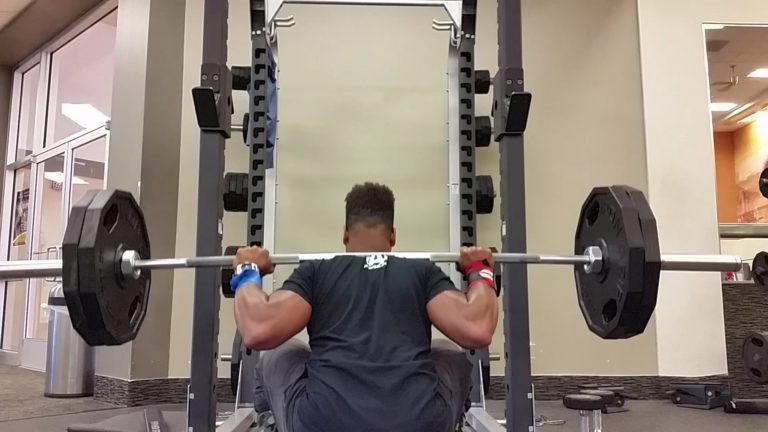
PHASE 3 – ACCESSORY WORK

This phase should consist of movements that compliment and work to improve on your primary movements of the training session. For example, if you were target the barbell bench press as your primary movement, your accessory exercises would be movements like dumbbell chest press, rows, overhead press, tricep extensions, etc. Core strength movements should be done towards the end. Accessory movements should be done with moderate to low weight and higher volume.
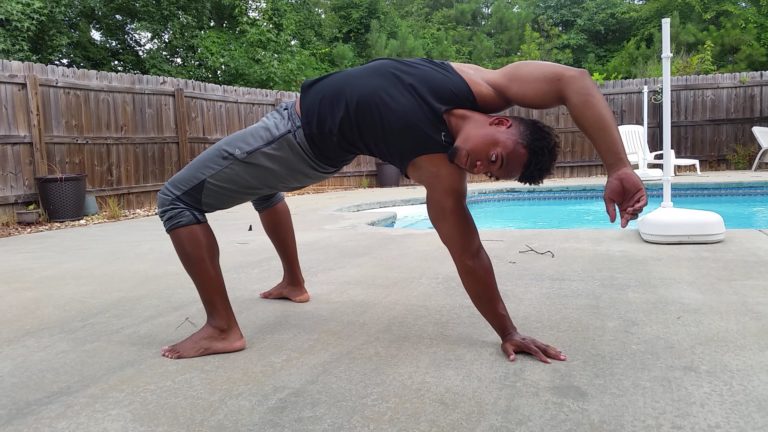
PHASE 4 – COOL DOWN

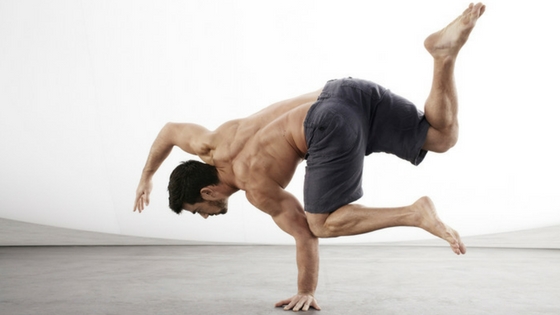
All the hard work is over and now its time to settle down and bring the body out of that state of stress. This could be yoga movements, dynamic stretching, and simple breathing exercises. If you have the time I would definitely advise that you not skip this phase. It helps more than most people think.

The Training Bell Curve

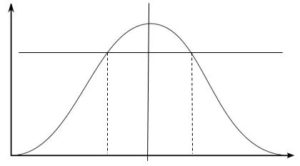
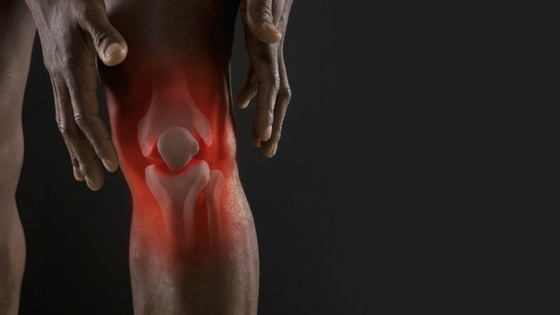
This curve is an example of how the intensity levels of your workouts should typically look in reference to the 4 phases. Your workouts should have a flow from low to high and back down again to recover. This type of strategy is key to managing the stress levels that training puts on the body. This will drastically reduce your risk of injury and keep you from over training. For more info on over training, read here.

Microe Meso & Macro Cycles

A solid training program should have these 3 cycles within it. The reason for this is because progress happens both in the short term as well as the long term. Only focusing on the short term, day to day training, will put you at risk for early plateauing. This is why you should plan your training cycles long term.

MICRO-CYCLE

This cycle describes the exercises, sets, and reps within a given training session. 

MESO-CYCLE

This cycle describes the layout of the training days within a given week.

MACRO-CYCLE

This cycle describes the weekly layout of an entire program lasting for atleast a month.

Tribe By Noire

tribe by noire

I’ve created this platform to help you become the most powerful version of yourself through fitness, plant based nutrition, and mindset coaching.

Categories
Fitness & Training

The Most Important Training Factor For Muscle Growth

Tribe By Noire

The Most Important Training Factor For Muscle Growth

You can go on google right now and type in “the best way to gain muscle” and all types of different answers will pop up. This is one of the reasons why most people have no idea what to do. What I aim to do here is simplify this topic as much as possible. I’m going to give you just ONE thing to focus on. So let’s talk about the most important training factor for muscle growth.

Focus On The Muscle Contraction

Focus on the muscle contraction! Sounds simple enough right? You see, training just serves as a form of stimulation, so greater stimulation naturally leads to greater gains, assuming you’re eating the right foods and sleeping enough.  What I’ve come to notice in my years of training clients is that most people don’t really have this understanding, so they never really focus on the contraction of the muscle they’re targeting. Maybe you’re guilty of this also.

What To Do When You're Not Feeling It

Its actually pretty common for people, especially beginners to not really feel the muscle working. The reason for this is a lack of what we gym rats call “The Mind Muscle Connection”. You have to develop a connection between your mind and whatever muscle your targeting. This can pretty difficult to do during complex movements. Pretty common examples of this are.

  • Not feeling your butt, or hamstrings during a squat or deadlift.
  • Not feeling your lats and mostly feeling your biceps in a row or pulldown. 
  • Only feeling your shoulders in a chest press.

If you identify with any of these examples, I’d advise you to take some time out in the beginning of your workout to do some isolation exercises that specifically target those dormant muscles. Some examples of that would be.

  • Hip Bridges and/or Donkey Kicks to target glutes.
  • Single Arm Lat Pulldown with a lateral torso flex to target lats.
  • Neutral Grip Cable Flys to target pecs.

*Become a member at Tribe By Noire to get video tutorials for all of these exercises and more. Extensive training programs are also included.

Take your time with each rep while performing isolation exercises to get the most benefit to your mind muscle connection.

Tribe By Noire

tribe by noire

I’ve created this platform to help you become the most powerful version of yourself through fitness, plant based nutrition, and mindset coaching.

Categories
Fitness & Training

3 Reasons To Not Do Cardio Before Lifting

Tribe By Noire

3 Reasons To Not Do Cardio Before Lifting

One of the most common mistakes that people make in the gym is setting cardio as priority number one. The first thing most people do when they first enter the gym is hop on a treadmill, elliptical, or recumbent bike. In a society plagued with overwhelming levels of obesity, cardio becomes an obsession, due to the belief that its the best and quickest way to lose weight. The truth is, resistance training should be priority number one if your goal is weight loss, and body re-composition. Let’s talk about 3 reasons to not do cardio before lifting.

3 Reasons To Not Do Cardio Before Lifting

Lifting is way better than cardio for weight loss

First lets talk about cardio and its primary focus. The purpose of cardio is implied in the name “cardio” as in training your cardiovascular system. There is great benefit to improving your cardio performance, and you’ll even lose some weight from it, but primarily focusing on cardio for weight loss will cause you to neglect training the bodily systems that use the most fat for energy.

Its during rest and other low intensity activities where you burn the most fat. This is why cardio activity like running isn’t the best for fat reduction and definitely not good for your knees. You’re better off walking long distance rather than running. During your workout, your body will use carbs for energy which brings me to my next point. If fat is mostly used during rest, it would be wise to prioritize the activity that causes the most energy usage after the workout (rest). That activity is weight lifting, or resistance training in general. 

The reason for this is recovery. It takes longer and requires more energy for the body to recover from lifting than cardio does. I wouldn’t tell you to completely cut out cardio, but if you’re gonna do it, do it at the end of your workout, or on days where you’re not lifting.

3 Reasons To Not Do Cardio Before Lifting

Cardio Before Lifting Will Hurt Your Training Performance

You only have a certain amount of energy to give within your workout, so you don’t want to be wasting it on cardio if you’re trying to build muscle and drop body fat. Lifting or any type of resistance training only builds muscle if the muscle is challenged and stimulated enough. You won’t be able to really challenge your muscle enough if you’re fatigued.

Cardio Before Lifting Will Hinder Movement Quality

When I say movement quality I mean muscular function and range of motion. The reason why this happens is because pre-exhausting the body will cause certain muscles to not fire with the amount of force that they are supposed to. For example, running can cause fatigue and tightness of the quadriceps and calve muscles, often results in excessive stress at the knee joint, hip, and lower back. This will not only hinder movement and create discomfort, but it often results in various injuries.

Cardio Before Lifting Can Lead To Over Training & Muscle Loss

Overall work volume is a big component to effective training. One of the fatal flaws that hold most people back from their fitness goals is doing too much! Doing cardio and then pushing your body through a rough lifting session on a consistent basis can lead to over training and muscle loss. A lot of work and not enough recovery leads to frustration and often causes people to lose motivation and quit. For more info on how over training works, read this.

The Perfect Warm Up

As far as warm ups go, the best way to warm up is to work your way through a couple of dynamic mobility exercises that specifically prep the muscle groups you’ll be using in that training session. For example, if you’re going to be doing legs, prep and get blood flow to the muscles that move your hips, knees and ankles.

Tribe By Noire

tribe by noire

I’ve created this platform to help you become the most powerful version of yourself through fitness, plant based nutrition, and mindset coaching.

Categories
Fitness & Training

Top 3 Mistakes In Gaining Muscle Mass

Tribe By Noire

Top 3 Mistakes In Gaining Muscle Mass

I want to talk about the top 3 mistakes in gaining muscle mass. I get questions all the time about how to gain muscle mass and what the best rep scheme is. Understand that there isn’t a one size fits all kinda program, but there are certain key mistakes that most people make that hurt progress the most.

Top 3 Mistakes In Gaining Muscle Mass

How Muscle Growth Works

  1. The brain sends an electrical impulse down the spine and through the nervous system.
  2. The nervous system then commands muscle to contract.
  3. That contraction then produces force and creates resistance. 
THE 2 REASONS FOR MUSCLE GROWTH
  • To produce force in order to move the body or other objects in a given environment.
  • To resist against force from external objects and gravity.
TRAIN & HUMAN ADAPTATION

One thing that the human body does extremely well is adapt to a given environment or lifestyle. These adaptations are a biological survival mechanism that make it easier for us to do what we do. The whole premise of training is to intentionally create these adaptations to get a desired result, like muscle growth. 

TRAINING TO IMPROVE FORCE PRODUCTION & RESISTANCE CAUSES MUSCLE GROWTH

In order to facilitate maximal force production and resistance, the body increases the size of its muscle. When you look at the purpose of muscle, it becomes obvious that strength training is the key to muscle growth.

Now that we’ve got that squared aware, let’s talk about the 3 biggest muscle mass killers.

1. Over Training

You want to work hard in the gym and challenge the body to grow, but you can definitely overdue it. This can be doing too many reps and it can also be lifting too much weight. The biggest causes of this is over zealousness and poor or no programming.

Strength training should be tested, calculated, tested, and then recalculated. It shouldn’t be a string of randomly chosen days where you just go to the gym and try to lift as heavy as possible. Get a good strength training program that is no less than 4 weeks and stick to it all the way through. Document the final results and continue from there.

For more on over training, read 6 signs of over training

2. Poor Eating Habits

There are so many different theories on how to eat, when to eat, and what to eat, but I want to dispel some myths about diet in regards to muscle growth.

YOU DO NOT NEED 1 GRAM OF PROTEIN PER POUND OF BODY WEIGHT, OR EVEN HALF THAT

The myth that you need to eat so much protein is straight up bro science and its dangerous. Too much protein intake causes fat gain, kidney disease, cancer growth, and other issues. 

In order to calculate your protein intake you need to find out what your lean mass index is. You typically need 1.5 – 1.8 grams of protein per kilogram of lean mass per day. 

This is a big part of the reason why I recommend following a vegan diet because meat, dairy, and egg eating tends to result in excessive fat and protein intake which results in all of the health issues we have today.

YOU CAN NOT SPEED UP MUSCLE GAIN BY EATING AS MUCH AS POSSIBLE

Muscle gain happens when you’re in a caloric surplus, but excessive eating causes an increase in body fat. The key is to slowly increase your caloric intake. For example, if you’re consuming 1800 calories per day to maintain your current body weight, increase it to a solid 2000 – 2100 calories for four weeks and document your results.

Typically you’ll gain an average of 1 lb of lean mass per month. Anymore than that is more than likely water and fat. When taking measurements, I would recommend circumference measurements, a skin-fold test with calipers, and obviously stepping on the scale.

JUNK FOOD DOES NOT HELP MUSCLE GROWTH

Eating junk food can inhibit muscle growth by bogging down your gut with toxins. Poor gut health hinders nutrients absorption and creates inflammation which leads to excess soreness, and low energy levels. All of your calories should come from nutrient dense foods.

For more info on how to improve gut health, read Fix your gut and lose fat with prebiotics 

3. Lack Of Sleep

Muscle does not grow in the gym, it grows at rest. The training in the gym is only to stimulate the muscle to spark the process of adaptation, but the building and repairing of muscle happens in bed with a good night’s sleep. 

Lack of sleep disrupts homeostasis which is the body’s natural state of balance. If this balance is disrupted, the body will reduce or even shutdown muscle growth in order to prioritize getting back that natural state of balance. This ultimately leads to over training, so they pretty much go hand in hand.

From what I’ve seen in my own personal journey as well as my clients, is that going to bed in between the hours of 8 and 10pm and waking up between 4 and 6am yields the most results. While following this type of sleep pattern, you may notice that you have twice as much energy as usual, a higher sex drive, more mental clarity, increased fat loss, and an increase of muscle size and strength.

Avoid These Pitfalls By Prioritizing Stress Management

Train with a mindset of self love and gratitude rather than a mindset driven by frustration and discomfort. Learn to enjoy the process and stay focused on all the positive changes you will experience in the future. 

Eat foods that heal and cleanse the body and avoid toxic foods at all costs. Take control of your diet by cooking all of your own foods. Take time to be aware of what you eat and have an honest dialogue with yourself about your lifestyle. That is how you begin to break bad habits.

For more on breaking habits, read How to rid yourself of bad habits

Manage your time as best as possible by scheduling out your days. Schedule everything! Set a limit to how much work you’re willing to take on in a given day and set a reoccurring bedtime. Setting boundaries is a great way of reducing the stress in your life. 

For more on reducing stress and even reducing negativity, read 7 ways to cut negativity out of your life

Thanks for reading, I appreciate you!

-Remson

Tribe By Noire

tribe by noire

I’ve created this platform to help you become the most powerful version of yourself through fitness, plant based nutrition, and mindset coaching.

Categories
Fitness & Training

The Truth About Squat Depth

Tribe By Noire

The Truth About Squat Depth

How deep should you squat? This is a question I get very often and its also a pretty loaded question. There is an ideal form of squat depth, but you also have to work within the confines of your mobility all while working to improve your mobility. So let’s dive a bit deeper into the truth about squat depth.

3 Things You Need To Know About Squat Depth

1. We all have the same parts, but we also have those parts in different measurements. Our proportions range differently from person to person which means our squat depth should as well. Even though our depth will range from person to person, it does not serve as an excuse to squat shallow.

2. Ultimately you should be able to sit in a squat position comfortably, pretty much how a toddler normally would. When did we lose our ability to sit in a proper squat position? Probably when we started spending most of our days sitting in a chair. That 90 degree knee bend, inherited from the chair has now become most people’s standard for squat depth. 

3. Squatting to full depth is only bad for your knees if you have imbalances like, weak glutes, overly developed quadriceps, and/ or limited ankle limited ankle mobility. If your bottom position feels uncomfortable, mobility is definitely an issue and needs to be addressed on a daily basis.

Learn To Squat Like A Toddler

Watch a one year old squat down to grasp something from the floor. Their feet stay roughly at hip distance, their knees abduct from their mid-line, and their hips drop to a full knee bend. Try to copy it and make note of where you feel the most discomfort.

Rounding of the back and falling backwards is usually a sign of limited ankle flexion. Push your knees out more and lean forward. If you can’t push your knees apart, it means you need to stretch the muscles in the inner thighs.

Grab hold of a door frame, or a pole fixture of some kind and use it to hold yourself up while you practice sitting in that bottom squat position. It may be tedious at first, but if you’re serious about getting good at squatting, you’ll stay consistent and work at this habitually.

Here’s a look at what the technical anatomy of your squat should look like. When working on improving your squat depth, record yourself in video form and see how close to this illustration you get.

Tribe By Noire

tribe by noire

I’ve created this platform to help you become the most powerful version of yourself through fitness, plant based nutrition, and mindset coaching.

Categories
Fitness & Training

2 Reasons Why You Should Use Unilateral Exercises

Tribe By Noire

2 Reasons Why You Should Use Unilateral Exercises

Unilateral training is absolutely essential in the gym. In fact, not using unilateral exercises in your training at all can be detrimental. In this article I’m going to explain what unilateral exercises are and 2 reasons why you should use unilateral exercises.

2 Reasons Why You Should Use Unilateral Exercises

What Are Unilateral Exercises?

Unilateral is basically a technical term used to describe something as one sided. This can be any exercise that is performed using only one arm or leg like a split squat or single arm press. These exercises are more time consuming and often more difficult, but the benefits far outweigh the cons.

2 Main Benefits Of Unilateral Exercises

1. IMPROVE CORE STRENGTH & TORSO STABILITY

During a unilateral exercise, the load or weight is distributed unevenly causing a greater challenge to maintain balance. This means that all of the muscles in your torso now have to work harder thus causing greater strength adaptions and a more define core.

2. IMPROVE SHOULDER, WRIST, HIP, AND ANKLE STABILITY

Working one side at a time allows for greater concentration on the muscles you are targeting on that side. I’ve had clients who have only trained bilaterally (both sides) for so long that they’ve developed some serious imbalances that hindered their progress in some major way.

One side ended up being way stronger than the other and even way bigger than the other. I’ve seen size difference of up to an inch and a half! This is a huge tell because if the muscle on one side is way bigger, this means that side is working a lot more and this often causes injury to the dominant side.

Unilateral training fixes this imbalance over time when implemented consistently. It allows you to more specifically train your central nervous system (CNS) in regards to a movement pattern on a given side. The results I’ve seen from this are

  • A more proportionate look
  • Over coming strength plateaus
  • Reduction or elimination of injury and/or joint pain

When Should You Do Unilateral Exercises?

You don’t have to do unilateral exercises every time you train, but I would advise you to incorporate them into your routine on deload periods, or on weekly intervals like every 3, 4, or 6 weeks as maintenance. However, if you have some major imbalances, you should be working on them daily.

Simple as that Tribe!

Drop a comment below and let me know if you’ve found this helpful, or if you have any other questions on this topic.

Thanks reading! I appreciate you

-Remson

Tribe By Noire

tribe by noire

I’ve created this platform to help you become the most powerful version of yourself through fitness, plant based nutrition, and mindset coaching.

Categories
Fitness & Training

3 Essentials To Building A Strong Functional Back

Tribe By Noire

3 Essentials To Building A Strong Functional Back

Building your back is vital to developing a strong and balanced body, yet so many people neglect it. Its common for people to train the muscles they see the most, like chest, arms, and abs, but understand that your back muscles are just as important and in some cases, should be trained more often than the muscles on the front. Moving forward I’m going to explain the 3 essentials to building a strong functional back.

Some Perks Of Training Back

  • Training your back will change your posture in a way that will make you stand more upright which will cause you to appear more confident and strong. Your posture actually effects how people behave toward you which is why this is so important in terms of social encounters. Weak back muscles lead to a hunched look that can cause you to look weak and timid.
  • Developing a strong back can relieve shoulder and neck tension by strengthening the muscles that pull your shoulders down and back in to place. Weak back muscles lead to overactive upper trapezius muscles and this greatly contributes to stress headaches and bunch of other issues.
  • Improving the strength of your back muscles will increase the integrity of your spine and greatly improve your joint function. This means that you greatly decrease your chances of slipping a disc, or getting a shoulder impingement. 
  • Obviously there is a major aesthetic appeal to developing a strong sexy back. Whether you’re a woman who wants to wear that new backless dress, or a guy who wants that broad shoulder look with the V Taper, I’d advise you to get to pulling.

1st Essential - Horizontal Pulling

Horizontal pulling is basically any kind of rowing motion. The key elements here are scapula retraction and shoulder depression. Good cues to keep in your head for these kinds of movements are to keep your chest out and your shoulders down as you pull towards your belly. Make a double chin throughout the movement to keep from sticking your neck out.

2nd Essential - Vertical Pulling

Vertical pulling is basically any kind of movement where you pull against resistance from an overhead position. The key elements here are scapula retraction/downward rotation, and shoulder depression. This can be pull ups, lat pull downs, high rows, etc. Again, keep your chest out and your shoulders down and make a double chin, but this time you’ll be pulling to your upper chest.

3rd Essential - Spinal Extension & Stabilization

Good examples of spinal extension and/or stabilization would be deadlifts, goodmornings, prone extensions, etc. The unique thing about these kinds of movements is that their primary function in regards to the back is to strengthen the spinal erectors and this requires little to no movement of the arms.

Putting A Back Routine Together

Putting together a back routine is fairly simple. Typically what I’d do is take 1-2 exercises from each of the 3 categories. The weight and reps would be set depending on the current goals of the program.

As long as you structure your workout around the essentials, you’ll be able to put together an effective and balanced back workout. 

You can also add unilateral training to your workout structure as well. For more on that topic, give this article a look. 2 reasons why you should use unilateral exercises

Thanks for reading! Get to pulling!

Tribe By Noire

tribe by noire

I’ve created this platform to help you become the most powerful version of yourself through fitness, plant based nutrition, and mindset coaching.

Categories
Fitness & Training

6 Tips To Improve Your Bench Press

6 Tips To Improve Your Bench Press

The barbell bench press is the standard for upper body strength which makes it an essential exercise to anyone trying to build upper body strength. It is also essential to do it correctly through a full range of motion, not only for maximum strength and muscular development, but also for joint health. No matter what your sport is, the form for the bench press remains the same and follows the same basic principles. Here are 6 tips to improve your bench press and save your shoulders.

1. Keep A Tight Grip On The Bar

Grip strength plays a large role in strength overall. In regards to the bench press, a loose grip on the bar results in the loosening of the smaller stabilizing muscles in the shoulder. This often result in a lack of control over the bar and even tearing of the shoulder. Keep tight on the bar and maintain control.

2- Keep Your Chest Up

Thoracic Extension (arching your back) is essential to any kind of weightlifting, due to the advantages it provides for torso position. This torso position makes it easier for you to retract your shoulder blades (scapular) to bring the bar down to the sternum. This also allows you to utilize the muscles in your upper back to assist in stabilizing the bar and driving it up to the top position. Think big chest.

3. Tuck Your Elbows At 45 Degrees

Tucking your elbows is also going to give you the ability to use your upper back muscles more and its also going to protect your shoulders. Benching with your elbows flared out is a very weak and risky position because of the lack of leverage and potential impingement at the shoulder joint. Keep those shoulders packed and secure throughout the press.

4- Unrack & Breathe In Deep

IBreathe deep into your belly, hold that breath throughout the rep, and exhale at the top. That deep breath allows you to get oxygen into the lungs while filling up the belly to create pressure, which helps stabilize the torso. Pull big air and push big weight.

5- Back & Hips Should Be Tight With Both Feet On The Ground

No loose bench pressing! People are often so focused on their chest that they forget about the rest of their body. Arch your back, keep your chest up, squeeze your butt, and push your feet into the ground. 

6- Keep Tight Until You Rack The Bar

There should be no slack in your body until the weight is racked. Treat the whole lift and every lift like its a thousand pounds.

Thank you for your time, I appreciate you!

-Remson

Join The Tribe

BECOME A TRIBE MEMBER

Categories
Uncategorized

3 Steps To Setup A Home Gym

3 Steps To Setup A Home Gym

3 Steps To Setup A Home Gym

Having a home gym is like a giant ball pit for a ferret. Its an adult play room for anyone committed to the fitness lifestyle. The home gym is one of the best lifestyle assets you can possibly have, but without the right strategy it can be very costly and even wasteful, so I’m gonna give you 3 steps to setup a home gym. Follow this and save yourself the headache.

Key Advantages To Having A Home Gym

TIME & TRAVEL EFFICIENCY

  • Those of us who have a really busy lifestyle have a tendency to struggle with setting aside time for the gym. Having a home gym cuts out the travel time and unnecessary traffic that comes with going back and forth to the gym.

ACCESS & ENVIRONMENT

  • I think its safe to say that we all hate overly crowded gyms and cramped spaces where there’s too much equipment or there is limited space in general. The beauty in having a home gym is that you are in complete control of just how many people occupy your training space. You’re also in control of everything else like what equipment is available, what music is playing, and what’s on the tv. 

Guidelines For Picking The Right Equipment

KNOWING YOUR PROGRAM & TRAINING STYLE

Before you pull the trigger on buying anything you need to figure out what your training program and training style are. Every piece of equipment you get should accommodate your training as efficiently as possible. For example, in order to calculate how much weight you need to buy, you need to know how much weight you’re using and how much weight you’ll be using further down the line. This is just one of the reasons why a program is essential.

Training style really depends on your goals and dictates what equipment you’ll need. For example, if all of your workouts are executed using under 100 lbs, then chances are you don’t need a barbell and plates, so dumbbells, kettlebells, and resistance bands would be a smarter investment in the beginning. 

CHOOSE SIMPLE, VERSATILE, PORTABLE,  SCALABLE, & DURABLE FIRST

Simple, Versatile, Portable Scalable Durable, keep these 5 words in mind when looking at equipment. Your average gym doesn’t really do such a good job with this. Take for example a bicep curl machine. Its not, simple, versatile, portable, scalable, or durable. Its heavy, large, expensive, and all of the moving parts make it more likely for something to break. Can you see why this is not a good investment?

An example of a good investment would be a barbell, bumper plates, and a squat stand. Its simple with very little moving parts which ties into durability. Its portable and scalable, just add weight. Most importantly its versatile which means you can do way more with it than bicep curls.

CREATE A BUDGET & COMPARE PRICES

Once you’ve got your budget together, you can search for equipment and compare prices. A good place to start looking is amazon.com because they typically have really good deals and a lot of different options. You can also find good deals on used equipment locally from small gyms, maybe even some that are going out of business. Another option is facebook marketplace, but the options could be pretty limited depending on your location. You can build your gym overtime, but the first things you should get are the essentials to your current training program.


Leave a comment and let me know if this information helped you. As always thanks for reading.

Categories
Fitness & Training

3 Steps To Fix Knee Hip And Lower Back Pain

Tribe By Noire

Exercise Selection And How To Make The Right Choices

Joint pain is one of the biggest struggles that people face today. This joint pain keeps people from being active and doing the things they love to do. It makes things like going up and down stairs a miserable experience. Throughout my 10+ years of experience, I’ve been able to help people to overcome and even completely fix joint pain. Let’s talk about the 3 steps to fix knee hip and lower back pain.

3 Steps To Fix Knee Hip And Lower Back Pain

1. Massage

There are various forms of massage that work to relieve excess tension from muscle which in turn relieves joint pain. Check out some of the methods of massage below.

  • Professional Massage

This can be, deep tissue massage, hot stone massage, shiatsu, reflexology, etc. These are the most effect for fixing issues, but not very cost effective.

  • Self Myofascial Release

This is basically a technical way of  saying self massage. This can be done with a foam roll, trigger point ball, or even your own hands. Its not as in depth and effective as professional massage, but needless to say its a lot more cost effective and very convenient.

*My recommendation is to apply self myofascial release daily before and after training and professional massage once a week.

Checkout my video on foam rolling.

2. Stretching

From my experience, joint pain is usually a case of poor mobility. An example of this would be tight hamstrings and calves limiting glute activation, which causes excess stress on the quadriceps that leads to knee pain.

My recommendation is to loosen up the muscle with self myofascial release before stretching. Checkout some of the stretching methods I’d recommend.

  • Active Isolated Stretching (AIS)

This stretch technique is held for only a few seconds at a time. Its performed for several repetitions, each time exceeding the previous point of resistance by a few degrees. Ideally this is performed for several sets with a specific number of repetitions.

  • Dynamic Stretching

This type of stretch is a series of continuous movement patterns that resemble fluid human movement. I personally tend to model my dynamic stretching drills after various yoga poses and martial arts techniques.

3, Strengthen

Weak or inactive muscles typically cause other muscles to work way more than they normally would, thus causing muscular imbalance. These muscular imbalances ultimately cause joint pain. In order to fix these imbalances you have to strengthen those lagging muscles. 

After you’ve applied self myofascial release, AIS and dynamic stretching techniques, you can start strengthening lagging muscles. There are two main ways to do this.

  • Isolation Exercises

These types of exercises only require one or two joints action and the use of one or two muscles. This allows you to better focus on activating a lagging muscle. Examples of this would be a hip bridge, hamstring curl, standing calve raise, etc.

  • Compound Exercises

These types of exercises are compound movements that involve the flexion and extension of at least 3 joints. Compound exercises are great for maximizing strengthen and body mechanics through improving muscle synergy. In other words this is the best way to train to be strong and balanced.

Knee, hip, and lower back pain should all be fixed at the same time because they are all directly connected. Unhealthy knees ultimately lead to hip and lower back pain and vice versa. 

Here are the main things to improve to fix joint pain.

  1. Ankle mobility
  2. Hip mobility
  3. Spinal extension
  4. Torso strength
  5. Glute strength
  6. Hamstring strength

Tribe By Noire

tribe by noire

I’ve created this platform to help you become the most powerful version of yourself through fitness, plant based nutrition, and mindset coaching.