Categories
Fitness & Training

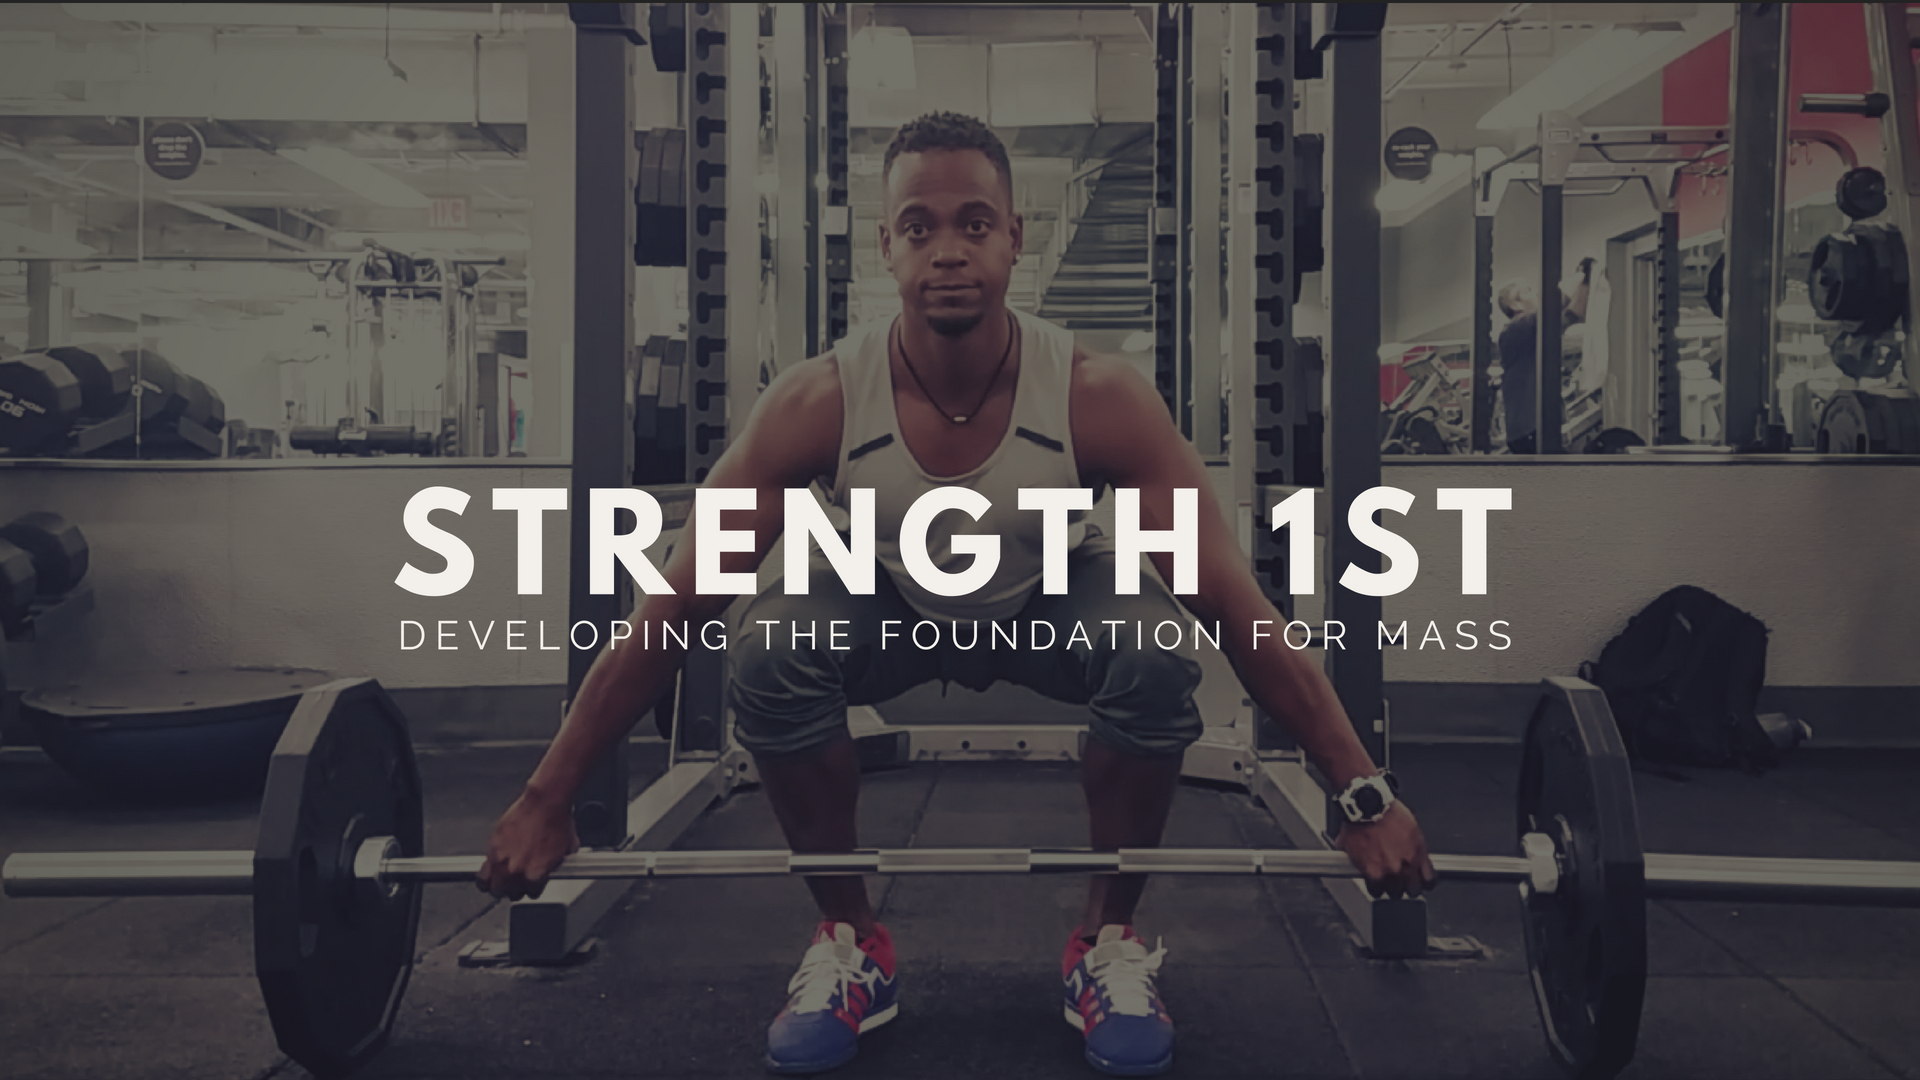
Developing Strength 1st Before Hypertrophy Training

Tribe By Noire

Developing Strength 1st Before Hypertrophy Training

The correlation between strength & mass

Most of us understand that there is at least some sort of correlation between strength and muscle size, but the question is, if you want to gain muscle size, what’s the most effective way to do it. The strongest people we see tend to have the most muscular bodies, so by that logic we should just train for strength right? That sounds reasonable enough, but the more you study the science on this topic, the more complicated the answer becomes. Stay with me for a bit here as a break down and explain the process.

the 3 steps of physique building

1. cutting phase

  • Ideally you want to get to your ideal body fat while gaining muscle at the same time. This is especially easier to do for people who are new to the gym. Doing cardio and fancy complicated exercises to get you winded is not really what I advise because we want to cut, not deflate. Instead you’d want to take the fundamental movements like squatting, deadlifting, pressing, and rowing, and do them with some fairly high rep sets like 16-20 reps. Throw some giant sets and super sets in there and you’re good to go.

2. strength phase

  • Once you’ve cut down to your ideal body fat level, or at least close to it, you need to start developing a real foundation for strength. The primary reason for this is that muscle grows primarily to facilitate strength and force production. Getting stronger increases your capacity for muscle growth. A strength phase of training has 2 primary objectives, which are to increase strength and quantify strength. This phase of training is going to be with pretty low volume with sets typically not exceeding more than 10 reps. By the end of your strength phase you should know your 1 rep maxes for each fundamental lift. Your 1 rep maxes will be the basis for step 3. 8-12 weeks at a time is good duration for this phase.

3. mass phase

  • This phase is all about hypertrophy, which is the scientific term for increasing muscle mass. Unlike most training programs, this type of training is not focused on increasing the amount of weight you’re lifting in each set. The focus is increasing the amount of reps or sets, from week to week.  I suggest working with weight that is either 70% of your 1 rep max, or in between 60-80% of your 1 rep max. The rep ranges I would suggest here are 6-8, and for accessory exercises I would suggest 10-12 or 16-20 reps. 

Tribe By Noire

tribe by noire

I’ve created this platform to help you become the most powerful version of yourself through fitness, plant based nutrition, and mindset coaching.

Categories
Fitness & Training

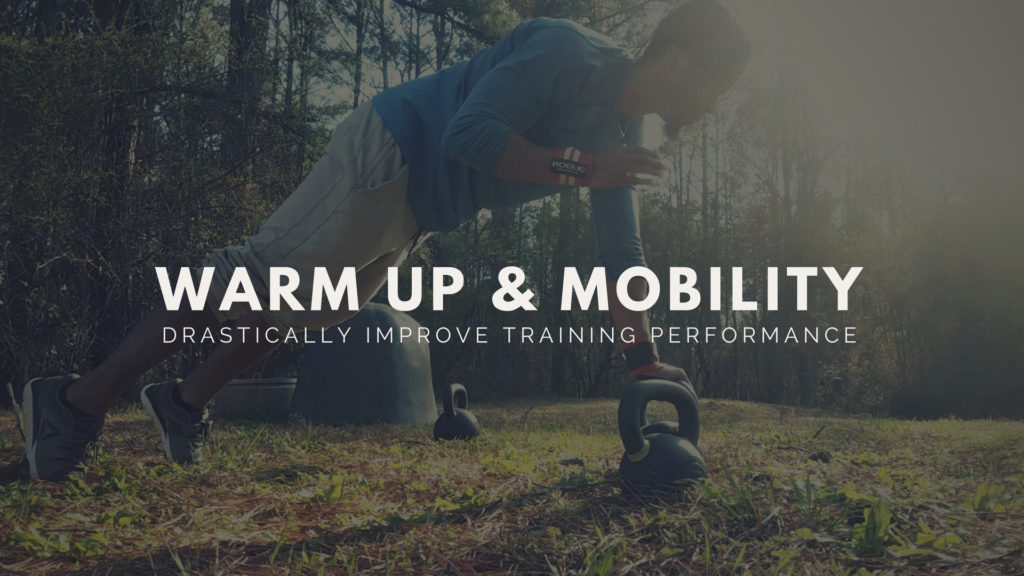
Dynamic Warm Up And Mobility Training Guide

Tribe By Noire

Dynamic Warm Up & Mobility Training Guide

Get The Right Start

We all know what a warm up is, at least some what. To some of us, its a quick 10 minute run on the treadmill, or a couple of basic stretches we learned in high school. Most people are under the assumption that the purpose of the warm up is to obviously… warm up. This is true, but your warm up should do much more for you than just raise your body temperature.

A good warm up should set you up to perform at your best by achieving 3 major goals. Those 3 goals are,

  1. Movement Prep
  2. Increase range of motion (ROM)
  3. Muscular activation

Skipping this process leads to training with poor form which can prevent you from building muscle, gaining strength and ultimately lead to some pretty nasty injuries aka getting snapped up. You do NOT want to get snapped up because that can put you out of the gym for weeks and even months.

Let’s take a deep dive into the dynamic warm up phase and mobility training.

Dynamic Warm Up And Mobility Training Guide

Intro To Dynamic Warm Up & Mobility

At the start of each workout should be exercises that prepare your body to perform the session’s exercises at an optimal level. For example, if you’re squatting, the dynamic warm up and mobility exercises should be specific to the muscles, joints, and movement patterns involved in the squat. The same rule applies to any other movements like pressing, rowing, deadlifting, etc.

Movement Prep

Movement prep is where you perform exercises that mimic the actual exercises you’re getting ready for. This primes your nervous system for that particular movement pattern. An example of this would be doing a body weight squat before doing squats with weight. This also allows you to see and feel your form and make any correction you need to before you get started.

Increase Range Of Motion

Increasing range of motion facilitates ease of movement and greater force production, which can also drastically reduce injury and increase muscular growth. For example, lengthening your hamstrings will get you a better deadlift which leads to strong thick hamstrings and glutes. Lengthening the muscle fibers of your chest will allow you to have greater movement at the shoulder blades, which in turn result in a bigger chest and back.

Muscular Activation

Any compound movement can feel very uncomfortable and lead to injuries over time if certain muscles aren’t firing like they’re supposed to. For example, having inactive glutes can lead to deadlifts being too stressful on the lower back and squats being too stressful on the knees. Inactive upper and mid back muscles can lead to shoulder injuries during bench pressing and shoulder pressing. These are the types of problems that are super common and you’re probably dealing with  some of this yourself.

Squat Dynamic Warm Up

There’s a few things to consider when warming up for an exercise like the squat. Whether you’re squatting with a barbell, dumbbells, kettlebells, or even just body weight, the considerations are pretty much the same. 

  • Hip and ankle mobility
  • Muscular activation of the glutes and quadriceps
  • Maintaining spinal extension 

6 reps

12 reps per side

12 reps per side

Deadlift Dynamic Warm Up

Deadlifts are all about maximizing the strength and efficiency of your hip hinge. Even though deadlifts require a full body effort, the glutes and hamstrings are the primary drivers. A few things to consider when warming up for this movement are,

  • Hip and hamstring mobility
  • Muscular activation of the glutes and lats
  • Maintaining spinal extension

8 reps

12 reps

12 reps per side

Shoulders & Chest Dynamic Warm Up

Warming up for an upper body workout pretty much works the same whether you’re pushing or pulling. The reason for this is the fact that both push and pulling both rely on the efficiency of movement at the shoulder complex.  Pushing and pulling are separated into two categories, vertical and horizontal. You can prep for both of these at the same time. A few key consideration here are,

  • Mobility of the shoulders and scapula in all planes of motion
  • Muscular activation of all 3 shoulder heads, rotator cuff, and scapula muscles

12 reps

12 reps

8 reps

Tribe By Noire

tribe by noire

I’ve created this platform to help you become the most powerful version of yourself through fitness, plant based nutrition, and mindset coaching.

Categories
Fitness & Training

3 Steps To Build Your Ideal Body In The Gym

Tribe By Noire

3 Steps To Build Your Ideal Body In The Gym

When I say “build your ideal body” I’m referring to a natural, athletic, healthy, human form. Its up to you how lean or muscular you want to look, and how large you want certain muscles to be, but achieving that look in an efficient time frame all boils down to these 3 steps. 

For the specifics on how to do this, keep reading below.

3 Steps To Build Your Ideal Body In The Gym

Step 1 - The Cutting Phase

The cutting phase is just a simple and sexy way of saying body recomposition phase. I have to make it clear that I am not advocating for cutting in the traditional sense of weight loss. The goal is specifically to reduce BODY FAT not just any ol’ weight loss. You don’t want to lose a lot of weight, but not really lose much body fat because that’s how you end up in the skinny fat category. If you already are in the skinny fat category, give this article a look here

The cutting phase should be a hypertrophy specific style of training. This style of training will get you to build muscle as you reduce body fat. This is important for building that ideal body you want, fast! In my experience, clients have been able to drop 4-6% body fat in 4 weeks in this phase. Clients who need to lose a lot of weight, lose and average 6-8 lbs a week. Here’s some examples of what that would look like.

4 Week Routine

Day 1

Goblet Squat 

3 sets x 10 rep min – 20 rep max

Stiff Leg Deadlift

3 sets x 10 rep min – 20 rep max

Walking Lunges

1 set x 100 reps

Open To Close Hollow

3 sets x AMRAP

Day 2

Barbell Row 

3 sets x 10 rep min – 20 rep max

Lat Pull Down

3 sets x 10 rep min – 20 rep max

Chest Press

3 sets x 10 rep min – 20 rep max

Shoulder Press

3 sets x 10 rep min – 20 rep max

Day 3

Goblet Squat 

3 sets x 10 rep min – 20 rep max

Stiff Leg Deadlift

3 sets x 10 rep min – 20 rep max

Walking Lunges

1 set x 100 reps

Open To Close Hollow

3 sets x AMRAP

Day 4

Barbell Row 

3 sets x 10 rep min – 20 rep max

Lat Pull Down

3 sets x 10 rep min – 20 rep max

Chest Press

3 sets x 10 rep min – 20 rep max

Shoulder Press

3 sets x 10 rep min – 20 rep max

  • Start with a weight you can do a maximum of 20 reps with
  • Increase the weight by 5-10% each set
  • Do as many reps as possible (AMRAP) on each set, with a minimum of 10 reps each set
  • Rest for 60-90 seconds in between each set

Step 2 - The Strength Phase

After you’ve completed the cutting phase and have dropped a considerable amount of body fat, you should start a strength training program. Even if your goal may not necessarily be to get as strong as possible, this is still a key phase in reaching your ideal body. There are 3 main things that your strength phase should achieve.

  • Develop a good foundation of strength
  • Improve your strength capabilities
  • Accurately quantify your strength

This style of training focuses on a much lower amount of reps, but the weight will be considerably higher. Each training day should revolve around the main compound lifts such as the barbell squat, deadlift, bench, overhead press, and row. This type of training will also get you to increase muscle mass and drop body fat as well even though those are not the primary focuses here. 

Here’s an example of what this type of training routine would look like.

4 Week Routine

Day 1

Barbell Deadlift

4 sets x 8 reps (last set AMRAP)

Barbell Back Squat

4 sets x 8 reps (last set AMRAP)

Dumbbell Bulgarian Split Squat

3 sets x 12 reps per side (last set AMRAP)

Supine Leg Raise Arc

4 sets x AMRAP

Day 2

Barbell Row

4 sets x 8 reps (last set AMRAP)

Barbell Bench Press

4 sets x 8 reps (last set AMRAP)

Dumbbell Incline Press

3 sets x 12 reps (last set AMRAP)

Barbell Bicep Curl

4 sets x 12 reps (last set AMRAP)

Day 3

Barbell Overhead Press

4 sets x 8 reps (last set AMRAP)

Pull Up

4 sets x AMRAP

Dumbbell S. Arm Row

4 sets x 12 reps per side (last set AMRAP)

Prone External Knee Tuck

4 sets x AMRAP

  • Start with a weight you can only do 12 reps with
  • Increase the weight by 5-10% each set
  • Do as many reps as possible on the last set
  • rest for 2 minutes in between each set
  • Increase the weight each week by 5-10% each week
  • Decrease the amount of default reps each week by 2 reps
  • Cut the amount you lift by 30-50% on week 4 to deload

Document all sets and reps and weight you used throughout this process. Week 3 will be the toughest week where you lift the most weight. To calculate your new one rep maxes, download an app called 1 Rep Max on your phone. Input the heaviest weight you did and how many reps you completed. The app will do the calculations for you.

Step 3 - The Mass Phase

The key focus in this phase is filling out your frame by building new lean muscle mass. For guys this would be a concentration on developing the back, chest, shoulders, arms, and thighs. For women the concentration would be on developing the lower body with an emphasis on glutes and hamstrings. 

This training phase requires a hypertrophy specific program where the amount of sets and/or reps increase over time. The weight should be around 65% of your 1 rep max (1RM). You should be able to calculate your 1RM and percentages using the data from your strength phase. Ideally, you’d target each muscle group 2-4 times per week in order to fully maximize results. An effective training split for this could be full body, or an upper lower training split.

Here’s some examples.

4 Week Routine (Men's)

Day 1 (Lower body)

Barbell Squat

5 sets x 8 reps

Barbell Deadlift

4 sets x 8 reps

Dumbbell Reverse Lunge

 4 sets x 8 reps

Alternating Crossbody Jack Knife

3 sets x AMRAP

Day 2 (Upper body)

Barbell Row

5 sets x 8 reps

Barbell Incline Bench Press

5 sets x 8 reps

Pull Up

4 sets x AMRAP

Barbell Curl

4 sets x 8 reps

Day 3 (Lower body)

Barbell Squat

5 sets x 8 reps

Barbell Deadlift

4 sets x 8 reps

Dumbbell Reverse Lunge

 4 sets x 8 reps

Alternating Crossbody Jack Knife

3 sets x AMRAP

Day 4 (Upper body)

Barbell Row

5 sets x 8 reps

Barbell Incline Bench Press

5 sets x 8 reps

Pull Up

4 sets x AMRAP

Barbell Curl

4 sets x 8 reps

4 Week Routine (Women's)

Day 1

Barbell Squat

5 sets x 8 reps

Barbell Hip Bridge

 4 sets x 12 reps

Dumbbell Reverse Lunge

4 sets x 8 reps per side

Alternating Crossbody Jack Knife

3 sets x AMRAP

Day 2

Barbell Deadlift

5 sets x 8 reps

Barbell Hip Bridge

4 sets x 12 reps

Close Grip Pull Up

4 sets x AMRAP

Dumbbell Chest Press

4 sets x 8 reps

Day 3

Barbell Squat

5 sets x 8 reps

Barbell Hip Bridge

 4 sets x 12 reps

Dumbbell Reverse Lunge

4 sets x 8 reps per side

Crossbody Jack Knife

3 sets x AMRAP

Day 4

Barbell Deadlift

5 sets x 8 reps

Barbell Hip Bridge

4 sets x 12 reps

Close Grip Pull Up

4 sets x AMRAP

Dumbbell Chest Press

4 sets x 8 reps

  • Start with 65% of your 1 rep max
  • Add 1-2 reps to each set every week for 3 weeks
  • rest for 90 seconds – 2 minutes
  • Cut the amount of reps down by 30% on week 4 to deload

Phase Duration

The length of each phase depends on what your goals are, and what your level of fitness is. Typically the cutting phase could take anywhere from 8-12 weeks. The strength phase can be done 4-8 weeks at a time and the mass phase can be run continuously over a period of 3-6 months. Do your best to maintain a low body fat percentage throughout the mass phase in order to avoid frequent cutting phases. 

Tribe By Noire

tribe by noire

I’ve created this platform to help you become the most powerful version of yourself through fitness, plant based nutrition, and mindset coaching.

Categories
Fitness & Training

Sets & Reps Guide To Physique Building

Tribe By Noire

Sets & Reps Guide To Physique Building

With each exercise, you’d do a given amount of repetitions (reps) and you do that amount of reps for a given amount of sets. For example if you’re doing bicep curls, you could be doing 3 sets of 10 reps, or 3×10. If that sounds confusing for you, think of it as 30 reps divided into 3 sets.

When considering how many sets and reps to do in your training routine you have to consider a variety of different aspects.

  • What is your training goal?
  • What muscle fibers are you targeting?
  • How much time do you have to train?
  • How much training volume do I need?
Sets & Reps Guide To Physique Building

Sets & Reps For Muscle Building

In order to effectively increase muscle mass, you need to maximize tension and muscle fiber recruitment during each exercise. There are a few options for getting this done, but in regards to sets and reps there’s 2 options.

  1. Use a heavy load with less reps.
  2. Use a moderate to light load with more reps.

The heavier loads will increase your strength and target your type 2 muscle fibers, which have the greatest potential for size development. Ideally the heavy lifting should come at the beginning of your training session. Lifting heavy after already being fatigued will limit training performance in these big lifts, thus limiting the results.

The moderate to lighter loads will target your type 1 muscle fibers. Training these muscle fibers will increase muscular endurance, blood flow, and improve stability. These lifts are secondary to your heavier lifts being that they perform better under sustained fatigue. An added bonus to training these muscle fibers is the drastically increased blood flow to the muscle that creates “the pump”.

Effectively training both muscle fiber types in the most strategic way will really maximize muscle growth as well as improve strength and performance. Here’s a quick example of what this looks like.

PRIMARY EXERCISES

8 Reps

6 Reps

4 Reps

SECONDARY EXERCISES

20 Reps

16 Reps

12 Reps

Optimal Rep Ranges For Muscle Building

The most common method used for building muscle is choosing a specific number of reps for each set. An example of this would be 1st set for 10 reps, 2nd for set 8 reps, 3rd set for 6 reps. This can work, but a major problem here is that rigidly sticking to the amount reps can cause you to leave a lot of training intensity on the table. Let’s say the goal is 8 reps, but you’re able to squeeze out 12 reps, did you maximize training intensity on that set if you stopped at 8? Did you maximize muscle tension?

If training intensity and maximal muscle tension is what creates the results we want, then the reps should facilitate the focus, not BE the focus. This is why rep ranges are ideal. An example of this would be 3 sets where each set has a rep range of 10-6. Start with a weight that you know you can get a maximum of 10 reps with. Increase the weight on each set and do as many reps as possible (AMRAP) in each set.

Both increasing the weight on each set and striving for the maximum amount of reps each set will allow you to get the most out of every workout. When you put everything together in a full training routine, this is what it look like.

1ST TRAINING DAY

Barbell Squat

3 Sets x 8-4 Reps (AMRAP)

Barbell Deadlift

3 Sets x 8-4 Reps (AMRAP)

Barbell Hip Bridge

3 Sets x 8-4 Reps (AMRAP)

Dumbbell Walking Lunge

3 Sets x 20-12 Reps (AMRAP)

2nd Training Day

Barbell Overhead Press

3 Sets x 8-4 Reps (AMRAP)

Barbell Bench Press

3 Sets x 8-4 Reps (AMRAP)

Dumbbell Incline Press

3 Sets x 20-12 Reps (AMRAP)

Dumbbell Lateral Raise

3 Sets x 20-12 Reps (AMRAP)

3rd Training Day

Barbell Row

3 Sets x 8-4 (AMRAP)

Weighted Pull Up

3 Sets x 8-4 (AMRAP)

Barbell Pull Over

3 Sets x 20-12 Reps (AMRAP)

Dumbbell Reverse Fly

3 Sets x 20-12 Reps (AMRAP)

*NOTE

This just serves as one example of this rep scheme idea just to give you a visual of what it looks like. This is a great setup to follow, but there are many others that also work really.

Tribe By Noire

tribe by noire

I’ve created this platform to help you become the most powerful version of yourself through fitness, plant based nutrition, and mindset coaching.

Categories
Fitness & Training

The Push / Pull / Legs Body Part Split Explained

Tribe By Noire

Push Pull Legs Training Split Explained

Push-Pull-Legs Split Explained

There are many different types of training splits to choose from, but right now I’m going to put some focus on one of my absolute favorites. The push, pull, legs training split is a favorite of mine, not just for the results I’ve gotten from it, but also for what its done for my training clients. 

Here’s a few ways to tell if this training split is for you.

  • You’re only able to train 3 days per week.
  • You get bored with a conventional body part split.
  • You’re an athlete who practices a sport multiple times a week.
  • You’re a natural lifter trying to build an impressive physique.
  • You want to do powerlifting or powerbuilding.

How This Training Split Works

The push pull legs training split is divided into 3 primary training days. On the push training day, you train all of the muscles that produce or assist in pushing movements. These muscles are typically the ones you use in bench pressing, shoulder pressing, and abs. On the pull training day, you’d train all of the muscles that are opposite from pushing. This would be the muscles that you use during rows, pull ups, and deadlifts. The leg day is reserved for all of the muscles you have from the waist down. The primary exercises on the leg day would be squats, lunges, deadlifts, and hip bridges. 

In my personal experience and with clients, the best physique results come when the 1st day is legs, 2nd day is push, and the 3rd day is pull, with a rest day between each. Leg day is the most demanding, so prioritizing it on day 1 allows you to come into the gym fresh and fully recovered. Push I put at number 2 rather than pull because push day typical doesn’t call for the use of any of the muscles from leg day.

Here’s some quick examples of how it would look.

LEGS

Squat

Deadlift

Hip Bridge

lunge

PUSH

Shoulder Press

Chest Press

Tricep Dip

Abs


PULL

Row

Pull Up

Bicep Curl

Reverse Fly

How Many Exercises Per Training Day

The answer to this question really depends on what your focus is and what your strengths and weaknesses are. Typically I think in terms of primary and accessory. So as an example, if the focus on push day is to develop bigger, shoulders, you would do 2 – 3 exercises for that muscle group. The Primary exercise would be a barbell press, single arm dumbbell press, and lateral raises. Then you’d use 1-2 exercises for chest triceps and abs. Over all, you’re looking at 5-8 exercises per training day.

Push Pull Legs For Powerlifting

Powerlifting revolves around the big 3 barbell lifts, bench press, squat, and deadlift. This is perfect for a 3 day training split because you can now have each training day dedicated to improving a specific lift. This means you can focus on strength, technique, and volume all at the same time. An important factor for natural lifters is the emphasis on recovery. Having more rest days means you get to go all out on your training days and see consistent gains without reaching burnout. 

Here’s an example of what training days would look like.

DEADLIFT

Barbell Deadlift

Single Arm Row

Single Arm Farmers Carry

Hanging Leg Raise

BECH PRESS

Barbell Bench Press

Dumbbell Incline Press

Half Kneeling Single Arm Press

Prone Tricep Press

SQUAT

Barbell Back Squat

Barbell Hip Bridge

Goblet Reverse Lunge

Prone External Knee Tuck

Cardio Conditioning

Cardio is a whole other topic on its own, but to keep things simple I’ll just tell you what I and my clients have seen the most results with. If you’re trying to lose body fat and gain muscle at an optimal rate, while still having a life outside of the gym, do 20 – 30 minutes of high intensity cardio conditioning a week. This can be sprinting, battle rope drills, burpees, etc. You can do this on training days, or non training days. I personal stick to 4-8 minute conditioning sessions 2x per week.

Tribe By Noire

tribe by noire

I’ve created this platform to help you become the most powerful version of yourself through fitness, plant based nutrition, and mindset coaching.

Categories
Fitness & Training

The Barbell Squat Guide For Complete Lower Body Development

Tribe By Noire

The Barbell Squat Guide For Complete Lower Body Development

CONNECT WITH ME ON SOCIAL MEDIA

There are many different barbell variations to choose from, so I’m gonna breakdown the differences and what you want to consider when choosing. 

  • Mobility limitation and injuries
  • Focus muscles and weaknesses
  • Posture and muscular imbalances

These key considerations make the difference between developing your lower body the way you want it and wrecking your joints. If you’re not sure how you should be squatting, keep reading.

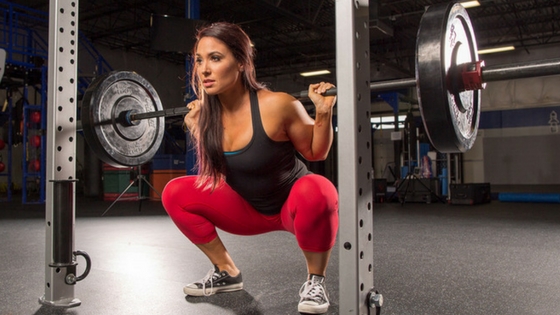
Barbell Back Squat

This is the most commonly used barbell squat, probably because its the least technical one. Mounting the bar on your back allows you to squat more weight than other variations.

When done right, through a full range of motion, your quadriceps, hamstrings, and glutes are targeted pretty evenly. The bottom position is where you get the most muscular activation in the glutes and hamstrings.

Toes should be slightly turned out with your knees tracking in line with the toes. Forcing your knees out over your toes during each rep will protect your knees and really target your glute medius.

The glute medius sits right above your glute maximus and completes the roundness and fullness of your glutes.

Barbell Low Bar Back Squat

This is a slightly different variation of the conventional back squat where the bar rests a bit lower on your back. This changes the center of gravity, creating more of a bend at the hip and less of a bend at the knee.

This slight change in form targets the glutes and hamstrings more and is a great alternative to those with limited ankle mobility, or over developed quadriceps. 

This squat variation places more of a demand on the torso, so if you have a weak core, back injury, or poor posture, this may not be the one for you.

Rest the bar right above your rear delts instead of directly at the top of your trapezius. Pull the bar in tight, squeezing your shoulder blades together.

Barbell Sumo Squat

The sumo squat is a great exercise for total glute development with a major focus on the glute medius. Being that the hamstrings aren’t as involved in this movement means more focus on the quadriceps.

 This squat variation doesn’t require a great deal of mobility which is great for those who have limited hip and ankle mobility. Just make sure you’re doing accessory exercises for working on your limitations.

The stance here is going to be much wider, which is going to require a bit more flexibility in the inner thighs. You want to make sure that you maintain a vertical shin in the bottom position. As usual, your knees she track in line with your toes.

Barbell Front Squat

The front squat is a bit more technical because of its emphasis on torso stability and shoulder mobility. On the flip-side the key advantages are the safety. You don’t have to worry about getting stapled under the weight because you can just dump it in front of you.

The primary reasons for front squatting are quadricep development, core strength development, and posture improvement. This carries over to all of the other barbell squats making you much more efficient at squatting.

Staying as vertical as possible throughout each rep is a key focus here. Keep your chest up and elbows pointed straight ahead. Do not let your elbows touch your thighs.

In the video I show you a couple of techniques to use if you have limited shoulder mobility and can’t quite get the front racked position.

Barbell Zercher Squat

The zercher squat is a great alternative to the conventional barbell front squat. It doesn’t require the shoulder mobility, or as much torso stability. You might want to start here when first getting into front loading.

Start with the bar resting on your thighs and hook your arms under the bar. The bar should rest cradled right on the inside of the bend in your arm. Make sure the bar, and your arms do not touch your thighs.

This barbell variation puts much more concentration on the legs by taking a great deal of stress off of the torso. Still, you need to focus on maintaining a vertical position.

Having the bar rest in the crease of your arm may be a bit uncomfortable. Use a cushion on the bar for extra support.

Tribe By Noire

tribe by noire

I’ve created this platform to help you become the most powerful version of yourself through fitness, plant based nutrition, and mindset coaching.

Categories
Fitness & Training

4 Exercises For Building A Strong Defined Core

Tribe By Noire

4 EXERCISES FOR BUILDING A STRONG DEFINED CORE

Flex | Extend | Twist

In order to effectively train your core, you need to understand how your core muscles function. In my 11 years of experience its become pretty obvious that most people have no idea… well maybe a little. The truth is if you need to do 500 reps of an exercise in order to feel it, stop doing it, or stop doing it the way you’re doing it. In this article I’ll be explaining the following.

  • The main core training movements
  • 4 exercises for core building
  • Core exercise video tutorials
4 Exercises For Building A Strong Defined Core

The Main Core Training Movements

Your core training should achieve 4 things
  1. Improve your posture
  2. Shrink your waist
  3. Lower your risk of back injury
  4. Add muscular definition to your core.
THE 3 MAIN MOVEMENTS OF CORE TRAINING
  • Flexion – This targets the Rectus Abdominis. Sit ups, crunches, leg raises, planks, all those exercises that are typically marketed as six pack builders. This is by far the most common form of core training.
  • Extension – This targets the Erector Spinae. Extension is just as important to train, but often neglected and even when done, its done ineffectively by most. When you train your spinal erectors correctly, it contributes a great deal to the look of your back and the quality of your posture.
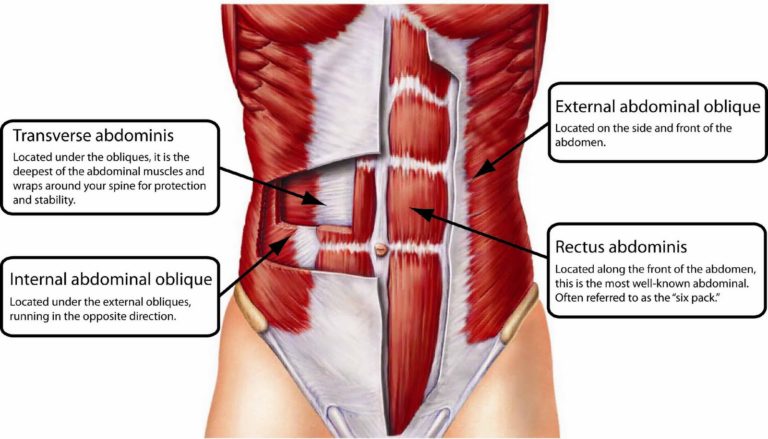
  • Twist – This targets the internal and external obliques (sides). Typically people make the mistake of target these muscles by doing some type of side bending exercise, but that actually targets a muscle on your back called the Quadratus Lumborum. The muscle fibers of the obliques actually run diagonally across the torso. Any movements that you use to target those muscles should follow that direction.
core anatomy

4 Exercises For Core Building

1. OPEN TO CLOSE HOLLOW

This exercise is great way to truly start developing your abs. If you’re doing exercises like sit ups and leg raises and feeling it mostly in your quadriceps and hip flexors, do this instead.

  • Start by laying on your back. Tuck your knees to your chest as much as possible while rounding out your back, and squeezing your abs.
  • Keeping the abs engaged, slowly stretch your legs and arms out and away from your torso. Do your best to not let your back arch.
  • Work within a range of motion that challenges you, but not to the point where you feel back pain.

2. Prone Back Extension

If you’ve been using a hyper extension to target your lower back, STOP! I’ve got a much better idea. This exercise will not only strength your lower back, but it will also strength your mid back, and improve your posture. 

  • Start by laying on your stomach with your palms flat to the ground, adjacent to your sholders.
  • Pick your chest and pams up from the ground while squeezing your glutes. Keep a neutral neck position throughout the movement.
  • Hold the top position for 1-2 seconds and then relax.

3. SUPINE LEG RAISE ARC

Rather than twisting frantically side to side with a weight in your hand, give this a shot. Core training should be controlled and strategically paced rather than rushed and jerky. Oblique exercises should be combined with spinal flexion.

  • Start flat on your back with your legs stretched out 45 degrees away from center with your hips rotated in that direction. Place your arms out to the side, palms down.
  • Brace your abs and raise your legs 90 degrees to center. Lower your legs 45 degrees to the other side.
  • Keep your feet together throughout the entire movement and Imagine tracing a large arch with your feet.

4. PRONE EXTERNAL KNEE TUCK

The thing that makes this exercise so effective is that it really works not only your abs big time, but also your Serratus Anterior, Obliques, and Quadratis Lumborum, in synergistic fashion.

  • Start at the top of the push up position with your shoulders directly over your wrists.
  • Brace your abs and bring your knee to the outside of your upper arm. Laterally flex your spine to get your thigh to physically touch the outside of your upper arm.
  • Keep your abs braced while bringing your foot back to the starting position. Each rep should be done at a slow and controlled pace.

Tribe By Noire

tribe by noire

I’ve created this platform to help you become the most powerful version of yourself through fitness, plant based nutrition, and mindset coaching.

Categories
Fitness & Training

The Fundamentals Of A Solid Fitness Training Program

Tribe By Noire

The Fundamentals Of A Solid Fitness Training Program

Real success towards reaching your fitness is in understanding the fundamentals of a solid fitness training program. You don’t want to be like most people in the gym who just go to the gym with no real game plan, you want to train. Training requires a program that lays out a solid path and natural progression. A few of the things I’m going to cover here are,

  1. What qualifies as a fitness goal.
  2. The 4 phases of a training session.
  3. The training bell curve.
  4. The micro, meso, and macro cycle.
the fundamentals of a solid fitness training program

What Qualifies As A Fitness Goal

To put it simply, a fitness goal is a goal that can only be reached through training. Fitness is the measure of how well you move. This includes things like strength, endurance, power, and mobility. Aside from improving performance there are training goals that revolve around body re-composition. This is where your training is put together with the intent to tailor your physique to look a certain way.

While body re-composition is a legitimate fitness goal, weight loss is not. Weight loss is not a legitimate fitness goal because you don’t need to train to lose weight. The only real way to manipulate your weight is through your diet. There is no shortage of people in the gym doing hours of cardio in a failed attempt to lose weight. Cardio is for improving cardiovascular performance, not weight loss.

The 4 Phase Of A Training Session

Your workouts shouldn’t just be a perpetual string of random exercises. The ideal workout should have 4 phases that flow seamlessly into one another in a specific order.

PHASE 1 – MOVEMENT PREP

This is the part where you get your body ready for the work you’re about to do, in other words, warm up. If today is going to be an intense squat day, you want your movement prep to be geared towards loosening the muscles and joints of that movement, and setting an efficient squat pattern. The same goes for any other primary movement or movements of the day.

PHASE 2 – PRIMARY MOVEMENTS

This is the phase where you tackle your main objective of the day. Your primary work would be where you target a specific movement and or skill. This is typical the most intense part of the workout in terms of performance output. An example of this would be a powerlifter targeting the conventional deadlift for the training session. Ideally the powerlifter would target a high load on the deadlift for low amount of reps. 

PHASE 3 – ACCESSORY WORK

This phase should consist of movements that compliment and work to improve on your primary movements of the training session. For example, if you were target the barbell bench press as your primary movement, your accessory exercises would be movements like dumbbell chest press, rows, overhead press, tricep extensions, etc. Core strength movements should be done towards the end. Accessory movements should be done with moderate to low weight and higher volume.

PHASE 4 – COOL DOWN

All the hard work is over and now its time to settle down and bring the body out of that state of stress. This could be yoga movements, dynamic stretching, and simple breathing exercises. If you have the time I would definitely advise that you not skip this phase. It helps more than most people think.

The Training Bell Curve

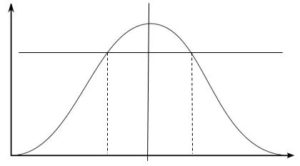
This curve is an example of how the intensity levels of your workouts should typically look in reference to the 4 phases. Your workouts should have a flow from low to high and back down again to recover. This type of strategy is key to managing the stress levels that training puts on the body. This will drastically reduce your risk of injury and keep you from over training. For more info on over training, read here.

Microe Meso & Macro Cycles

A solid training program should have these 3 cycles within it. The reason for this is because progress happens both in the short term as well as the long term. Only focusing on the short term, day to day training, will put you at risk for early plateauing. This is why you should plan your training cycles long term.

MICRO-CYCLE

This cycle describes the exercises, sets, and reps within a given training session. 

MESO-CYCLE

This cycle describes the layout of the training days within a given week.

MACRO-CYCLE

This cycle describes the weekly layout of an entire program lasting for atleast a month.

Tribe By Noire

tribe by noire

I’ve created this platform to help you become the most powerful version of yourself through fitness, plant based nutrition, and mindset coaching.

Categories
Fitness & Training

Top 3 Strategies For Building Lean Muscle Mass

Tribe By Noire

Top 3 Strategies For Building Lean Muscle Mass

There are all kinds of different opinions on how to build lean muscle mass. To be honest with you, any strategy can work if you do it for the right amount of time. The catch is that even the greatest strategy will ultimately stop working over time. The smart strategy is to have not just one, or even two, but have 3. Let’s get into the top 3 strategies of lean mass building.

1

Increase The Amount Of Weight

Muscle size will increase as you become stronger. The reason for this is because your body has to adapt to heavier weight . A good example of strength training would be to 5 sets of 5 reps. The idea is that you stick with the same amount of sets and reps, but week after week you increase the amount of weight. 

Week 1

5×5 @ 135 lbs

Rest 2-3 mins between each set

Week 2

5×5 @ 155 lbs

Rest 2-3 mins between each set

Week 3

5×5 @ 175 lbs

Rest 2-3- mins between each set

Week 4

5×5 @ 195 lbs

Rest 2-3- mins between each set

This strategy can work for a few consecutive months, as long as you include deload weeks. For those of you who don’t know, a deload week is a training week where you significantly reduce training intensity to recover from training stress. Basically just lift light that week. Ultimately though, this strategy will stop working due to the fact that strength progress will slow down and it will become impossible to continue adding weight to the bar.

2

Increase The Amount Of Training Sets

Muscle size will grow in order to accommodate a greater training volume. Your training volume basically implies the quantity of repetitions you do rather than the quantity of weight you lift.  A good example of this training volume strategy would be increasing the amount of sets you do with a given weight from week to week. 

Week 1

5×8 @ 135 lbs

Rest 1-2 mins between each set

Week 2

6×8 @ 135 lbs

Rest 1-2 mins between each set

Week 3

7×8 @ 135 lbs

Rest 1-2 mins between each set

Week 4

8×8 @ 135 lbs

Rest 1-2 mins between each set

This strategy can work for a few months as well, but eventually you will have to change strategies because it will be impossible to continually keeping adding sets. Attempting to do so will result in workouts being excessively long and over training which leads to a decrease in muscle mass as well as performance.

3

Increase The Amount Of Training Reps

This strategy is an alternative way to increase training volume. The goal with this strategy is to gradually increase the amount of reps you do in a given set. Unlike strategy number two, this method doesn’t require you to increase the amount of sets you do. The amount of sets you do should actually decrease, which would serve as an indication that you’re strength and muscular endurance  is improving. This strategy especially works with body weight exercises like push up and pull ups. Its also a very effective way to train arms, or any single joint muscle.

Week 1

100 rep goal

Complete in 6 sets

Rest 15-30 secs between each set

Week 2

100 rep goal

Complete in 5 sets

Rest 15-30 secs between each set

Week 3

100 rep goals

Complete in 4 sets

Rest 15-30 secs between each set

Week 4

100 rep goal

Complete in 3 sets

Rest 15-30 secs between each set

Before you try this strategy, BE WARNED, this is an intense method and takes tremendous will power. Squeezing out every last rep you can, burns like crazy. Eventually though you’ll have to ease off of this type of training because it can lead to over-use injuries because of the build up in inflammation in the muscle tissue. 

Tracking Performance & Channging Methods

Driving muscle is a matter of manual transmission. You gotta know when to switch gears. One of the most common things I’ve seen people do is stick with a certain training method to the point that their progress stalls. The easiest way to avoid this is to track your progress really closely. Typically the first 3 months that you follow a given strategy, you’ll see pretty good results. After that 3 month mark, things can start to slow down. That slow down in progress is an indication that its time to make a change. 

In my experience, using two different strategies from opposite ends of the spectrum yield the most results, with minimal sacrifice. The way I would advise you to do this is by splitting your workouts up into 2 phases. The 1st phase would be the low volume heavy lifting, and the 2nd phase would be the higher volume with lighter loads. In most cases this is best way to get the most benefit out of every training session. Here’s what it would look like.

Session 1

Phase 1 (Low Volume/Heavy Weight)

Barbell Back Squat

Phase 2 (High Volume/Low Weight)

Dumbbell Goblet

Prone Leg Curl

SESSION 2

Phase 1 (Low Volume/Heavy Weight)

Barbell Bench Press

Phase 2 (High Volume/Low Weight)

Dumbbell Incline Press

Seated Row

SESSION 3

Phase 1 (Low Volume/Heavy Weight)

Barbell Deadlift

Phase 2 (High Volume/Low Weight)

Barbell Hip Bridge

Prone Leg Curl

SESSION 4

Phase 1 (Low Volume/Heavy Weight)

Barbell Overhead Press

Phase 2 (High Volume/Low Weight)

Lat Pull Down

Face Pull


Tribe By Noire

tribe by noire

I’ve created this platform to help you become the most powerful version of yourself through fitness, plant based nutrition, and mindset coaching.

Categories
Fitness & Training

The Most Important Training Factor For Muscle Growth

Tribe By Noire

The Most Important Training Factor For Muscle Growth

You can go on google right now and type in “the best way to gain muscle” and all types of different answers will pop up. This is one of the reasons why most people have no idea what to do. What I aim to do here is simplify this topic as much as possible. I’m going to give you just ONE thing to focus on. So let’s talk about the most important training factor for muscle growth.

Focus On The Muscle Contraction

Focus on the muscle contraction! Sounds simple enough right? You see, training just serves as a form of stimulation, so greater stimulation naturally leads to greater gains, assuming you’re eating the right foods and sleeping enough.  What I’ve come to notice in my years of training clients is that most people don’t really have this understanding, so they never really focus on the contraction of the muscle they’re targeting. Maybe you’re guilty of this also.

What To Do When You're Not Feeling It

Its actually pretty common for people, especially beginners to not really feel the muscle working. The reason for this is a lack of what we gym rats call “The Mind Muscle Connection”. You have to develop a connection between your mind and whatever muscle your targeting. This can pretty difficult to do during complex movements. Pretty common examples of this are.

  • Not feeling your butt, or hamstrings during a squat or deadlift.
  • Not feeling your lats and mostly feeling your biceps in a row or pulldown. 
  • Only feeling your shoulders in a chest press.

If you identify with any of these examples, I’d advise you to take some time out in the beginning of your workout to do some isolation exercises that specifically target those dormant muscles. Some examples of that would be.

  • Hip Bridges and/or Donkey Kicks to target glutes.
  • Single Arm Lat Pulldown with a lateral torso flex to target lats.
  • Neutral Grip Cable Flys to target pecs.

*Become a member at Tribe By Noire to get video tutorials for all of these exercises and more. Extensive training programs are also included.

Take your time with each rep while performing isolation exercises to get the most benefit to your mind muscle connection.

Tribe By Noire

tribe by noire

I’ve created this platform to help you become the most powerful version of yourself through fitness, plant based nutrition, and mindset coaching.